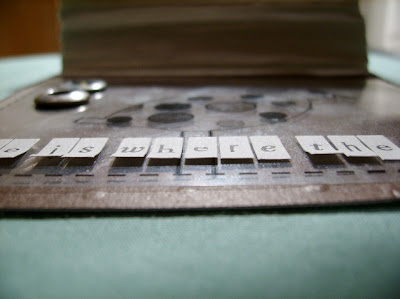
Well... here's what I do :)
1. Use the slanted edge of a clear ruler. (The spacing/measurements don't matter to me, but if you're anal, you can use them) 2. Stick each letter sticker on the edge of the ruler, leaving lots of the sticker hanging off the ruler. Don't press them down hard, just let it kiss onto the ruler. (yes, i just invented that term) As you place them down, space them evenly and how you want them to look once attached to your project. You can do this by putting the clear ruler onto your project so you can picture the space and layout without the stickers "sticking down". 3. If you have any other elements in your Alphabet sticker phrase(ex. button, rubon, flower), put it on the table with the ruler on top of it and leave the appropriate amount of space amoungst your stickers. This way the gap is just the right size! In the example below, I had a blue heart rubon instead of the word "Heart". Genius, I know ;)

5. When they're in postition, hold the ruler&project in place and press the stickers onto the project surface. They will still be attached to the ruler.
6. Hold the ruler with both hands and rotate the bottom edge of the ruler towards yourself. This will lift the ruler from the stickers.


Oooh, I love it LA...thanks for the tutorial :)
ReplyDelete(can't wait to see more of that mini-album)
can´t wait to get to put some more itmes to etsy! :)
ReplyDeletei´m now finished with my school tasks, so i have time for some fun.
very good idea - there is also a tool that I use called a Titletopia from Creative Memories (I know - gasp) and it works great - comes with a non stick backing page etc and you can make circles, waves etc -and it's only $8 for the waves/straight lines and the seperate circle one.
ReplyDeletehow seriously informative. I never would have thought there was an art to it...but like...there is!
ReplyDeleteHey...let's go with that option. I'll buy the bag. :) Kay?
Your brother likes me? As in, he's crushin on me? *chuckles
you so smart :)
ReplyDeleteIt's funny that I never thought of this before.... GREAT IDEA LA!
ReplyDeleteHi LA :) This has got to be THE smartest scrapping tip EVER! I like to think I'm pretty good at "eye-balling" things but this makes places alpha stickers slick as you-know-what! Thanks! :D
ReplyDeletejust saw this from your other post today! great tip! thanks! I will certainly be using it!
ReplyDeleteAHH this makes so much sense! sweet!
ReplyDelete